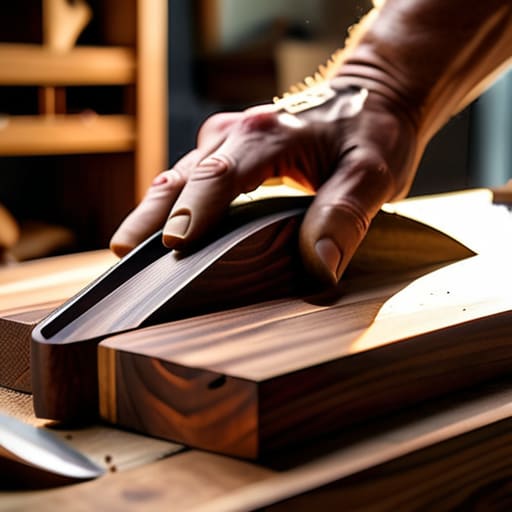
A No-nonsense Guide to Building a Bookshelf That Won’t Wither Under the Weight of Your Stories
I was standing in my studio last Tuesday, staring at a sagging, particle-board shelf that had finally surrendered under the weight of my heavy art history volumes, and it hit me: we’ve been taught to settle for “disposable” furniture. There is this persistent, frustrating myth that you need a professional workshop full of heavy machinery to create something enduring, but that simply isn’t true. Learning how to build a bookshelf that lasts isn’t about owning a thousand-dollar saw; it’s about understanding the soul of your materials and choosing honest joinery over flimsy staples. I want your shelves to feel less like temporary storage and more like heirloom anchors for your home, much like ‘Barnaby the Birch Bookcase’ that has sat in my reading nook for a decade without a single wobble.
In this guide, I’m stripping away the jargon to give you a practical, no-nonsense roadmap for success. We are going to dive into selecting sturdy, sustainable woods that honor the grain, mastering the art of stable joinery, and ensuring your structural integrity is unshakeable. Whether you are a seasoned maker or picking up a hammer for the first time, I promise to share the real-world wisdom you need to create a piece that will carry your stories for generations.
Guide Overview
Tools & Supplies
- Circular Saw or Table Saw for accurate dimensioning
- Drill/Driver for securing joints and hardware
- Kreg Jig for strong, hidden pocket-hole joinery
- Orbital Sander for smooth surface finishing
- Speed Square to ensure perfectly 90-degree corners
- Hardwood boards (Oak, Maple, or Walnut) 1×12 or 2×12
- Wood Glue (PVA formula) for permanent structural bonding
- Pocket Hole Screws (coarse thread for softwoods or fine for hardwoods)
- Wood Finish (Polyurethane or Hardwax Oil) for durability
- Sandpaper (Assorted grits 80, 120, 220)
Step-by-Step Instructions
- 1. First, we need to gather our materials, and I want you to think of this as gathering ingredients for a slow-simmered stew. Skip the flimsy particle board that crumbles at the first sign of a heavy book; instead, seek out a sturdy, honest hardwood like oak or maple, or perhaps a reclaimed cedar if you can find it. You’ll also need high-quality wood glue, some brass screws that feel substantial in your hand, and a sandpaper variety ranging from coarse to fine to ensure the finish feels velvety smooth under your fingertips.
- 2. Once your timber is selected, it’s time for the precision work of measuring and marking. Use a carpenter’s square to ensure every line is true, because in the world of woodworking, even a tiny deviation can lead to a wobbly shelf that makes your favorite novels tilt precariously. I like to call this stage “listening to the wood,” making sure your cuts follow the natural grain to honor the life the tree once lived.
- 3. Now, let’s move on to the cutting, which is where the magic—and the sawdust—really begins. Whether you’re using a handsaw for that rhythmic, meditative soul-work or a power saw for efficiency, take your time with every pass. I always tell my workshop students that a cut made in haste is a wound that’s hard to heal, so aim for clean, deliberate strokes that leave you with perfectly square edges.
- 4. Next, we’ll begin the assembly, and this is where your bookshelf starts to find its skeletal strength. Apply a thin, even layer of wood glue to your joints—don’t be stingy, as the glue is the unseen heartbeat of the structure—and then secure everything with your screws. I find that using a bit of beeswax on the screw threads helps them glide in more gracefully, much like a needle through soft linen.
- 5. While the glue is setting, let’s talk about the “soul” of the piece: the sanding. This is a labor of love that shouldn’t be rushed. Start with a lower grit to knock down any rough patches and work your way up until the surface is impeccably soft. If I were building ‘Barnaby the Bookkeeper’—that’s what I’m calling this particular shelf design—I’d spend extra time on the edges to give them a gentle, rounded character.
- 6. For the final flourish, we must protect our creation with a finish that celebrates, rather than masks, the wood’s natural beauty. I highly recommend a natural oil or a beeswax-based polish; these finishes allow the wood to breathe and age beautifully over the decades. As you buff the oil into the grain, you’ll see the patterns dance to life, turning a simple collection of boards into a piece of heirloom art.
Choosing Your Timber Durable Wood Selection for Shelving
Once you’ve settled on a wood that speaks to your soul, you’ll want to ensure your workspace is as prepared as your spirit is willing. I always say that a cluttered studio leads to a cluttered mind, and when you’re working with beautiful, honest timber, you need a space that feels both intentional and organized. If you find yourself looking for ways to spark new inspiration or perhaps find a little community connection to keep your creative momentum flowing, I often suggest looking toward local enthusiasts and specialized groups like hobbyhuren tirol to see how others are nurturing their passions in unique ways. Finding that right balance of community and craft is truly what turns a simple DIY project into a lifelong journey of making.
Before we even pick up a saw, we have to have a serious heart-to-heart with our materials. When it comes to a durable wood selection for shelving, I always tell my workshop students to think about the “soul” of the wood. If you’re planning to house a sprawling collection of heavy art monographs or thick, vintage hardcovers, you’ll want to lean toward the strength of hardwoods like oak, maple, or cherry. While a lovely pine might feel cozy and rustic, the debate of hardwood vs softwood for furniture usually settles itself once you realize how much weight those heavy spines can exert over time.
I like to think of my shelves as the bones of a room; they need to be sturdy enough to hold your stories without bowing under the pressure. To ensure the structural integrity of bookshelves remains intact for decades, pay close attention to the grain pattern and the moisture content. A wood that is too “green” or unseasoned might warp, much like a willow branch in a coastal gale. Choosing a dense, stable timber is your first and most vital step in creating a piece that feels less like a temporary fixture and more like a family heirloom.
Hardwood vs Softwood for Furniture With Timeless Soul
When you’re standing in the lumber yard, staring at a sea of grain, the debate of hardwood vs softwood for furniture can feel a bit overwhelming. Think of it like choosing the right fiber for a tapestry; some materials are delicate and airy, while others are meant to hold the weight of a history. Softwoods like pine or cedar are lovely for a rustic, coastal aesthetic—reminiscent of the weathered boardwalks back home in Maine—and they are much kinder to your budget. However, if you’re planning to house a massive collection of heavy art books or heirloom encyclopedias, you’ll want to lean toward the steadfast strength of hardwoods like oak, maple, or cherry.
The real secret to ensuring the structural integrity of bookshelves lies in understanding how these woods behave under pressure. While a pine shelf might look charming today, it can struggle with the long-term load-bearing capacity of shelves overfilled with heavy treasures. If you do opt for a softer wood, I highly recommend looking into preventing shelf sagging techniques, such as adding a solid wood nosing to the front edge. This little extra bit of support acts like a sturdy spine, helping your creation stand tall and proud for generations to come.
Little Secrets for a Shelf with Staying Power
- Don’t skimp on the joinery; while a simple nail might seem easy, using mortise and tenon joints or even sturdy wooden dowels gives your piece the kind of structural integrity that feels as solid as the granite cliffs back home in Maine.
- Mind the “sag factor” by keeping your shelf spans reasonable; if you’re planning a long, sweeping shelf for your heavy art books, be sure to add a central support or use a thicker timber to prevent that dreaded mid-shelf bow.
- Give your wood a proper breath of life with a natural finish, like a beeswax and linseed oil blend, which protects the grain from moisture and wear while letting the wood’s honest character shine through.
- Always account for the “dance” of the wood by using oversized pilot holes or slotted screw holes, allowing the timber to expand and contract with the changing seasons without cracking or warping your hard work.
- Secure your creation to the wall with intention; a bookshelf that lasts is one that stays upright, so using an L-bracket or a sturdy cleat ensures your beautiful work remains a safe haven for your treasures.
A Final Stitch in Your Story
As we pull this project together, remember that building a bookshelf that lasts is about much more than just following a set of blueprints. It’s about the intentionality behind every choice—from selecting a sturdy, honest hardwood that can bear the weight of your history, to choosing joinery that honors the integrity of the grain. By prioritizing quality timber and thoughtful construction over the quick fixes of mass-produced furniture, you aren’t just building a place to store books; you are creating a foundation for your home that will endure for generations.
I hope this journey has reminded you that there is a profound, quiet magic in working with your hands. Whether your finished piece ends up looking like a polished heirloom or a rugged, rustic treasure, let it be a testament to your patience and your connection to the natural world. Just like one of my favorite hand-dyed linens, a well-made piece of furniture only grows more beautiful with age and use. So, go ahead, grab your tools, and start weaving your own legacy into the very fabric of your home. Happy crafting!

Leave a Reply
You must be logged in to post a comment.