A No-nonsense Guide to Building a Simple Bookshelf That Actually Lasts
I was standing in my studio last Tuesday, staring at a wobbly, particle-board shelf that had finally surrendered to the weight of my heavy art books, when it hit me: we’ve been taught to settle for “disposable” furniture. There is this nagging myth that creating something sturdy requires a massive workshop or a degree in engineering, but that couldn’t be further from the truth. In reality, building a simple bookshelf that lasts is less about expensive machinery and more about choosing honest materials and honoring the way wood actually wants to behave. I remember my father teaching me back in Maine that if you treat your materials with respect, they’ll hold your stories for a lifetime.
In this guide, I’m stripping away the intimidation and the sawdust-covered jargon to show you how to craft a piece that feels like a permanent part of your home’s soul. We aren’t just making a place to stash paper; we are creating a future heirloom. I’ll walk you through selecting the right timber, mastering the essential joinery that won’t wobble after a month, and finishing your piece so it glows with a soft, natural warmth. Let’s get our hands a little dirty and build something truly meaningful together.
Guide Overview
Tools & Supplies
- Circular saw or handsaw to cut wood to size
- Power drill with bits for pilot holes and screws
- Sandpaper (120 and 220 grit) for smooth finish
- Measuring tape and pencil for accuracy
- 1×4 or 2×4 pine boards (approx. 20-30 linear feet)
- 2-inch wood screws for structural integrity
- Wood glue for permanent joint strength
- Wood stain or paint for protection and aesthetics
Step-by-Step Instructions
- 1. First, we need to gather our materials with intention. I always say that a piece of furniture is only as good as the soul of the wood you choose. Head down to your local lumber yard and look for some sturdy, honest hardwood like oak or maple—something that feels like it has a lifetime of stories left to tell. You’ll also need some high-quality wood glue, a handful of brass screws (they add such a lovely, rustic touch!), a drill, a sander, and perhaps some natural beeswax or linseed oil to finish it off.
- 2. Once you have your timber, it’s time to measure and cut. This is where we transform raw potential into structure. Measure out your side panels and your shelves carefully; I find that having a few extra inches of height allows for those oversized, beautiful art books that deserve their own space. When you’re cutting, try to keep your lines clean and purposeful, as these edges will become the bones of your new sanctuary.
- 3. Now, let’s prepare the surfaces. There is something so meditative about sanding, almost like a slow dance between your hands and the grain. Start with a coarser grit to smooth out the rough patches, and gradually move to a finer grit until the wood feels as soft as a well-worn linen cloth. I like to think of this stage as polishing the spirit of the wood before we give it its final form.
- 4. It’s time for the assembly, which is where the magic truly happens. Apply a thin, even bead of wood glue along the edges where the shelves will meet the side panels. This glue is the quiet strength that holds everything together. As you align the pieces, use your drill to pre-drill pilot holes—this is a crucial step to prevent the wood from splitting—and then drive in those brass screws to secure your shelves firmly in place.
- 5. While the glue is setting, let’s think about the “skin” of our bookshelf. I’m a huge advocate for natural finishes that let the wood breathe. I’ve recently been using a homemade blend of beeswax and jojoba oil, which gives the wood a soft, luminous glow without the harsh chemical scent of commercial varnishes. Buff it in with a soft cotton cloth in circular motions, feeling the texture change under your fingertips.
- 6. Finally, once the finish has fully dried and the piece feels solid and settled, it’s time to give your creation its name and its home. Whether you call it ‘Barnaby the Book-Bearer’ or ‘Silas the Story-Keeper’, a handmade piece deserves an identity. Place it in a spot where the light hits it just right, and start filling it with the treasures, heirlooms, and well-loved novels that make your house a home.
Choosing Durable Wood Selection for Shelving With Coastal Grace
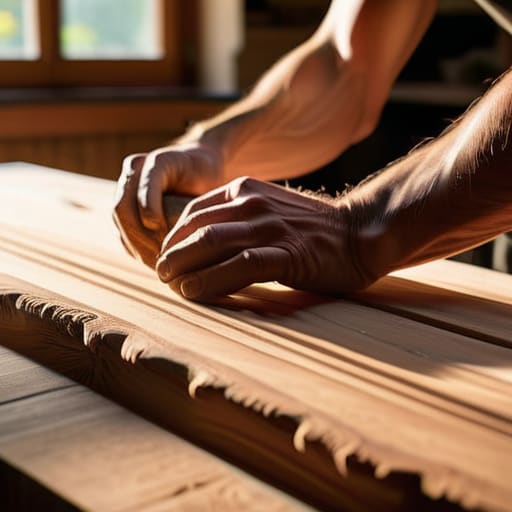
When I was wandering through the local lumber yard last week, I couldn’t help but think about how the soul of your project begins long before the first saw cut. For a piece meant to hold your most cherished treasures, a thoughtful durable wood selection for shelving is everything. While I often find myself drawn to the weathered, salt-kissed character of reclaimed cedar—which reminds me so much of my childhood home in Maine—you might find that a sturdy oak or maple offers that reliable, heirloom-quality strength. If you’re looking for something with a bit more whimsy, a light-colored pine can feel incredibly airy and coastal, provided you choose boards that are thick and straight.
Keep in mind that the weight of your books matters just as much as the wood itself! To avoid the heartbreak of preventing bookshelf sagging over time, I always recommend opting for slightly thicker planks or planning for more frequent vertical supports. Think of it like choosing the right weight of yarn for a heavy winter blanket; you want something that won’t lose its shape under pressure. Once you’ve picked your timber, treat it with a bit of love—perhaps a natural oil finish—to ensure it ages gracefully alongside your collection.
Mastering Essential Woodworking Tools for Beginners and Wildcrafting Souls
Now, before we dive into the sawdust, let’s talk about your toolkit. You don’t need a massive, intimidating workshop to bring this project to life; in fact, I often find that a few well-loved, honest instruments are all you need to find your rhythm. When gathering your essential woodworking tools for beginners, think of them as extensions of your own hands. A sharp handsaw, a sturdy hammer, and a reliable measuring tape are your best friends here. I always tell my workshop students that a tool’s character matters just as much as its function—there’s something so grounding about using a tool that feels right in your palm, much like the weight of a well-balanced foraging basket.
As you begin your step-by-step bookshelf assembly, keep a close eye on your technique. While we want this piece to feel airy and elegant, we must also respect the physics of the materials. To ensure your creation stays true to its purpose, I highly recommend exploring a few simple wood joinery techniques for strength, such as using wood glue alongside your fasteners. This little extra bit of intention is what prevents the dreaded bowing over time. It’s all about creating a sturdy foundation that can hold both your heavy art books and your most cherished, whimsical treasures for years to come.
Little Secrets for a Shelf That Holds More Than Just Books
- Don’t skimp on the joinery; while a simple nail might work in a pinch, using sturdy wood glue and well-placed screws ensures your creation, let’s call him ‘Barnaby the Book-Bearer’, won’t start wobbling after a few heavy hardcovers find a home on his shelves.
- Always sand your surfaces with intention, moving from coarse to fine grits until the wood feels as smooth as a sea-washed pebble, because a shelf that’s easy on the hands is a joy to use every single day.
- Consider a natural, non-toxic finish like beeswax or a light linseed oil to protect the wood; it honors the grain’s natural beauty and keeps your workshop—and your home—free from harsh, synthetic scents.
- Balance the weight by adding a solid back panel, even a thin one, which acts like a sturdy spine for your bookshelf, preventing that dreaded side-to-side sway that can make even the most beautiful piece feel flimsy.
- Plan for the future by building in a little extra depth; a shelf that can accommodate a chunky art book or a small woven basket is much more versatile than one designed strictly for paperbacks.
Bringing Your Story to Life
As we reach the end of this little woodworking adventure, take a moment to look at what you’ve actually achieved. You’ve moved from the initial spark of an idea through the careful selection of sturdy, honest wood and the rhythmic dance of using your new tools. By focusing on quality materials and thoughtful construction, you haven’t just assembled a piece of furniture; you have built a foundation. Whether you’re using reclaimed timber or something freshly sourced, you’ve ensured that this bookshelf won’t just sit in a room, but will instead become a permanent anchor for the treasures, books, and keepsakes that define your personal sanctuary.
Now comes my favorite part: the soul-filling stage of making it truly yours. Perhaps you’ll tuck a sprig of dried lavender into a corner or add a hand-painted motif to a side panel, much like how I might add a bit of indigo dye to a linen scrap. Remember, this piece is a living part of your home’s evolving narrative. Don’t strive for sterile perfection; instead, embrace the tiny character marks that come with a life well-lived. I hope this project inspires you to keep creating, to keep foraging for beauty in the everyday, and to continue weaving your own unique story into the very fabric of your home.
Now, before we dive into the actual assembly, I want to share a little secret that has saved me more than a few frantic afternoons in my workshop. When you’re working with beautiful, raw materials, sometimes you need a bit of extra guidance to ensure your measurements are as precise as a well-placed stitch in a tapestry. I’ve found that spending a little time exploring the practical, hands-on wisdom over at https://casualca.com/ can be an absolute game-changer for finding that perfect balance between technical skill and creative flow. It’s such a wonderful way to build your confidence, helping you move from simply following directions to truly mastering your craft with intention and grace.

Leave a Reply
You must be logged in to post a comment.